Chimney Liner Repair in Baldwin, NY: What to Do Before the Next Fire Season
A cracked or deteriorated chimney liner can allow heat and combustion gases to escape into areas they should not reach. Depending on the damage, a faulty liner can increase the risk of a house fire or carbon monoxide exposure. If you have noticed unusual smoke, debris in the firebox, or damage mentioned in a previous inspection report, arrange a professional assessment before using the fireplace again. Homeowners in Baldwin, NY, can use the months before the next heating season to understand their repair options, compare estimates, and address liner problems.
Before You Start: Stop Using a Suspected Damaged Chimney
If a professional has identified liner damage or you have reason to suspect the chimney is unsafe, stop using the connected fireplace or appliance until it has been evaluated and cleared for use. Do not assume that the system is safe simply because smoke appears to exit normally.
Carbon monoxide is colorless and odorless. If a carbon monoxide alarm sounds or you suspect combustion gases are entering your home, get everyone outside immediately and call 911 or the appropriate emergency service from a safe location. Do not delay your exit to open windows or investigate the source. Install carbon monoxide alarms as required by local code and follow the manufacturer’s placement instructions.
Coastal weather, moisture intrusion, freeze-thaw cycles, settling, and chimney fires can all contribute to chimney deterioration. However, the exact cause of liner damage cannot be determined from a home’s location or age alone. A professional inspection is the best way to establish the condition of your chimney and identify the next steps.
Step 1: Identify the Type of Chimney Liner
Before discussing repairs, ask the chimney professional to identify the liner system currently installed. Common liner types include:
-
Clay tile: Sections of ceramic flue tile installed inside a masonry chimney.
-
Stainless steel: A metal liner that may be flexible or rigid, selected for the appliance and installation requirements.
-
Cast-in-place: A specialized material installed within the existing chimney to form a new flue lining.
Each system has different repair and replacement considerations. Clay tiles may develop cracks or damaged joints, while metal liners can experience problems depending on their material, condition, and use. Cast-in-place systems may be suitable for certain damaged or irregular flues.
Do not choose a repair based on liner type alone. The chimney’s overall condition, the connected appliance, flue dimensions, and applicable installation requirements all matter. The CSIA’s homeowner guide explains the main liner types and factors to discuss with an experienced installer. <Cite refs={[“turn504790search58”]}/>
Step 2: Arrange a Level 2 Chimney Inspection
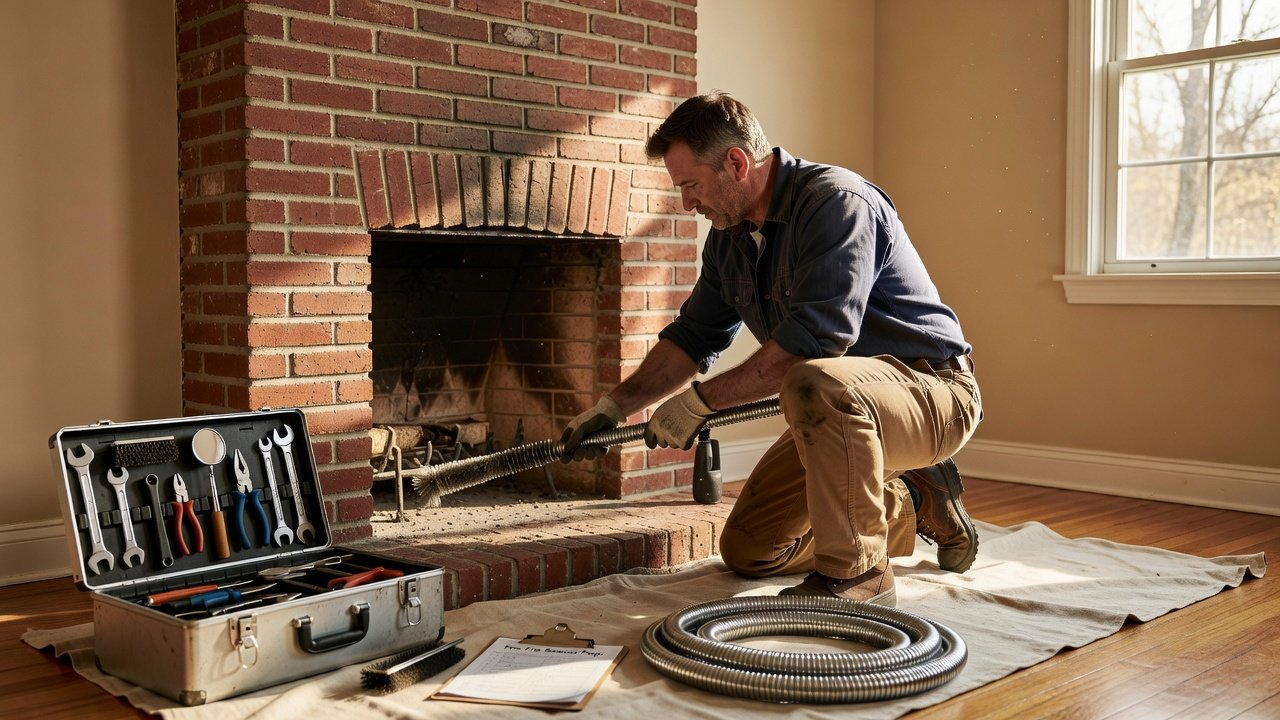
A quick look through the fireplace opening cannot reveal every problem inside a chimney. A Level 2 inspection provides a more detailed assessment of accessible areas and includes an internal video scan or similar examination of the flue.
The CSIA identifies several circumstances in which a Level 2 inspection is appropriate, including a property transfer, a change in appliance or fuel, a chimney fire, or an event or malfunction that may have damaged the system. It is also appropriate when a Level 1 inspection cannot determine whether the chimney is suitable for continued use. <Cite refs={[“turn504790search59″,”turn504790search5”]}/>
If you are preparing for a liner repair in Baldwin, ask the contractor whether a Level 2 inspection is appropriate for your situation. Request documentation of the inspection findings and ask for photographs or video of any visible damage when available.
Inspection prices vary by provider and scope. Some companies offer inspection and cleaning as a combined service, while others price a more detailed inspection separately. Obtain a written quote rather than relying on a general price range.
Step 3: Request a Written Inspection Report
A useful inspection report should explain the chimney’s condition and identify any defects the technician found. Depending on the system, findings may include cracked clay tiles, separated joints, missing mortar, displaced sections, corrosion, or other damage.
Ask the contractor to specify:
-
The liner type and condition.
-
The location and extent of any damage.
-
Whether the chimney should remain out of service.
-
The recommended repair or replacement method.
-
Any additional inspection, permit, or testing requirements.
-
The estimated cost and scope of work.
Not every visible defect requires the same repair. For example, damage confined to a small area may have different options from widespread cracking or a structurally compromised liner. The contractor should explain why the proposed solution is suitable for the actual condition.
If a report recommends a major replacement without explaining the evidence, ask for further documentation or obtain another professional opinion before authorizing the work.
Step 4: Compare Chimney Liner Repair Options
The appropriate repair depends on the type of liner, the extent of the damage, and the appliance being vented.
Localized repair
A localized repair may be appropriate when the defect is limited and the rest of the system remains suitable for use. The professional must determine whether an approved repair method can restore the required performance and safety. Not every crack or failed joint can be repaired in place.
Stainless steel relining
A properly selected stainless steel liner can provide a new flue passage within an existing chimney. The liner must be compatible with the connected appliance and installed according to its listing, manufacturer instructions, and applicable code requirements.
The installer should explain the selected liner material, size, insulation requirements, and how the installation addresses the original problem.
Cast-in-place relining
A cast-in-place system uses a specialized material and forming method to create a new lining within the existing chimney. Depending on the product and chimney condition, it may be suitable for certain irregular or deteriorated flues.
It is not automatically the best or most economical option for every damaged chimney. Ask the contractor to explain why the proposed system is appropriate and whether other compliant solutions are available.
Replacing clay tiles
In some cases, replacing damaged clay flue tiles may be possible, but the work can require opening the surrounding masonry. The extent of access and reconstruction needed will affect the feasibility and cost of this option.
A new liner is not automatically required for every sign of wear, and a patch is not automatically adequate for every crack. The inspection findings should guide the decision. The CSIA’s homeowner guide describes stainless steel and cast-in-place systems as common relining options. <Cite refs={[“turn504790search58”]}/>
Step 5: Verify the Contractor and Local Requirements
Before hiring a contractor, ask about relevant chimney experience, current CSIA certification if advertised, insurance, references, and the proposed installation method. You can use the CSIA website to learn about certification and chimney safety.
Also ask whether the proposed liner work requires a building permit or inspection. Requirements can depend on the municipality, appliance, scope of work, and applicable code. Contact the relevant building department in Baldwin or the property’s local jurisdiction to confirm what applies before work begins.
Request a written estimate that identifies the materials, labor, scope of work, exclusions, and any expected follow-up inspection. Confirm who is responsible for obtaining required permits and arranging any final inspection.
Step 6: Prepare Your Home for the Repair
Before the installation appointment, ask the contractor how to prepare the work area. You may need to:
-
Move furniture and fragile belongings away from the fireplace.
-
Clear access to the hearth and nearby work area.
-
Protect nearby items from dust as directed by the contractor.
-
Arrange safe access to the property and any necessary work areas.
-
Keep children and pets away from the work zone.
The duration depends on the liner system, chimney height, access, and any repairs required before installation. Ask the contractor for a realistic schedule and instructions about when the appliance can be used again. Some systems require a specified curing period or additional checks before use.
Do not assume that every relining project takes the same amount of time or that a particular weather forecast determines whether the work can proceed. Follow the installer’s requirements for the selected product and installation conditions.
Step 7: Keep Up With Annual Chimney Inspections
Installing a new liner does not eliminate the need for routine chimney maintenance. The CSIA follows NFPA 211 guidance recommending that chimneys, fireplaces, and vents be inspected at least once a year. Cleaning, maintenance, and repairs should be completed when necessary. <Cite refs={[“turn504790search15”]}/>
During an inspection, a qualified professional can check for combustible deposits, obstructions, deterioration, and other conditions that may affect safe operation. The frequency and type of cleaning depend on how the system is used and what the inspection reveals.
Keep copies of the installation documents, liner specifications, inspection reports, and repair records. These details can help future technicians understand the system and evaluate any changes or problems.
Troubleshooting: Smoke Enters the Room After a Liner Repair
Smoke entering the living area after a repair should not be dismissed as a normal adjustment. Stop using the fireplace and contact the installer or a qualified chimney professional to investigate the cause. If a carbon monoxide alarm sounds or anyone experiences symptoms that could indicate carbon monoxide exposure, leave the home and call emergency services from outside.
Draft problems can have several causes, including an obstruction, an incorrectly sized liner, an appliance issue, or a problem with the installation. A professional needs to assess the system before it is used again.
Do not attempt to warm the flue by holding lit newspaper near the damper or using another improvised flame test. The cause should be identified and corrected safely before the fireplace returns to service.
Schedule Chimney Liner Service in Baldwin, NY
If your chimney liner has not been assessed recently, or an earlier inspection identified damage, arrange a professional evaluation before the next heating season. An inspection can help establish whether the system needs cleaning, localized repair, relining, or further investigation.
Ridgewood Chimney is named as a provider serving Baldwin, Freeport, Merrick, and surrounding South Shore communities. Before publishing a service offer, confirm the company’s current service area, active credentials, inspection process, and whether it provides free inspections and written reports.
You can review its current service information at Ridgewood Chimney’s website if this is the intended business website. Confirm the correct URL before publication.
Taking time to understand the inspection findings and compare written proposals can help you choose a repair that addresses the actual problem and prepares your chimney for safe use.
Related from Baldwin Chimney: Chimney Repair in Baldwin, NY — Local Experts Who Know What Baldwin Ho · Chimney Repair in Baldwin · Chimney Repair in Baldwin, NY — Fixing the Damage Before It Gets Expen
Our services
Creosote Removal in Baldwin, NY Before One Cold Night Bec… · Chimney Cleaning in Baldwin, NY · Professional Chimney Repair in Baldwin, NY · Chimney Cap Replacement, Liners & Dampers in Baldwin, NY · Chimney Repair in Freeport
Areas we serve
Baldwin, NY · Dryer Vent Cleaning Baldwin, NY · Baldwin, NY · All areas →