
What’s Wrong with Your Chimney Crown? Common Problems and How They’re Repaired
A cracked chimney crown doesn’t announce itself. Most homeowners in Baldwin, Freeport, and the surrounding Nassau County towns don’t realize there’s a problem until water starts showing up where it shouldn’t: a damp firebox, a stained ceiling near the flue, or masonry that’s visibly spalling after a hard winter. By then, the crown has usually been failing for a couple of seasons.
The chimney crown is the concrete or mortar cap that seals the top of the chimney structure around the flue liner. It’s not the same as a chimney cap, which is the metal cover that sits directly over the flue opening. The crown covers the entire masonry top and slopes water away from the liner toward the edges, where it drips clear of the brickwork below.
When the crown fails, water gets into the masonry system. On Long Island, where freeze-thaw cycles are common between November and March, that’s a reliable way to turn a small hairline crack into a serious structural problem within two or three winters.
Here’s what the diagnostic process actually looks like and what getting it repaired involves from start to finish.
The Six Problems We See Most Often, and How They’re Diagnosed
Hairline Cracking Across the Crown Surface
This is the most common finding during a CSIA-standard Level 1 or Level 2 inspection.
Hairline cracks may look minor from the ground, but the crown is exposed to the elements year-round. Water enters the crack, freezes, and gradually widens it.
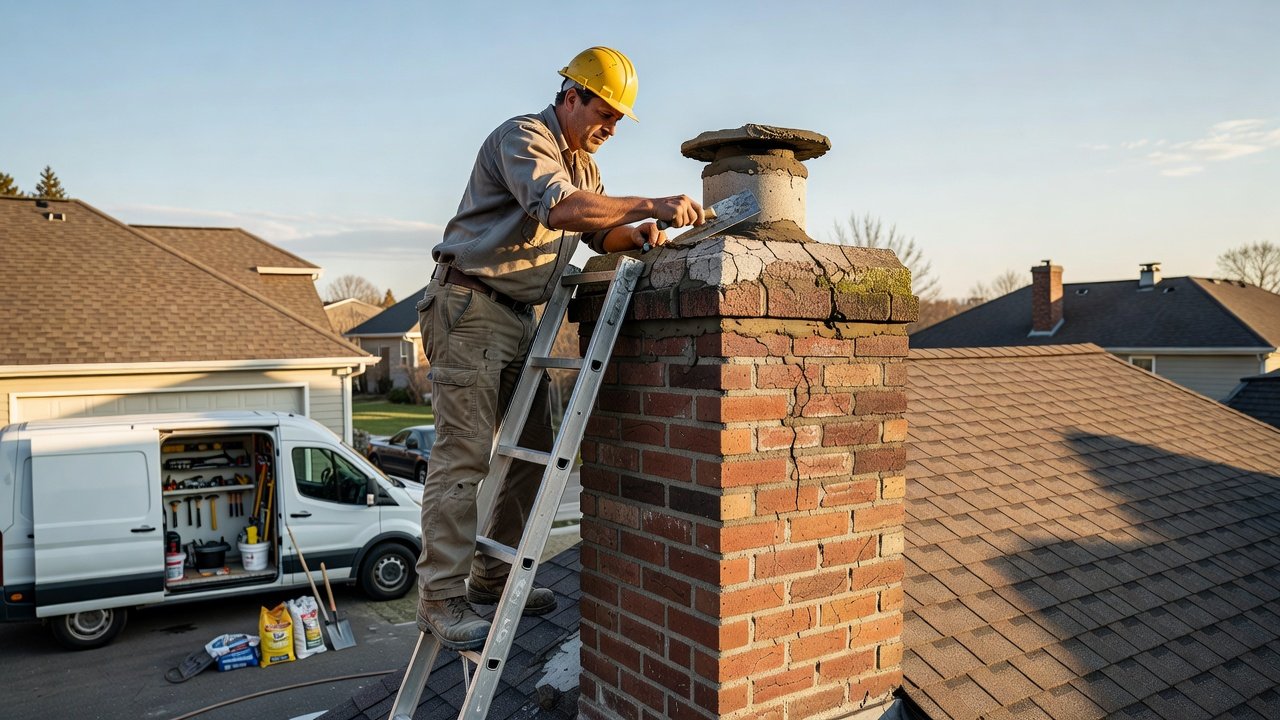
A technician on the roof will probe the crack to determine its depth and width, check whether it extends through the full thickness of the crown, and look for efflorescence (white mineral staining) on the masonry below as evidence that water is already migrating through.
Shallow surface cracks that don’t penetrate the full crown can often be sealed with a flexible, breathable crown coating such as ChimneySaver CrownCoat. Full-thickness cracks typically require more extensive repairs or a complete crown replacement.
Can this be prevented?
Yes, to a degree. Original crowns built with straight Portland cement and no added sand or aggregate tend to crack sooner. Properly mixed concrete crowns with a drip edge overhang last significantly longer. Applying a quality crown sealant as part of regular maintenance can further extend their lifespan.
Crown Deterioration from a Poor Original Build
Many chimney crowns on homes in Baldwin and Freeport were built using leftover mortar instead of a proper concrete crown mix.
Mortar-based crowns are softer and more porous than concrete, and they often begin breaking down within five to ten years.
During an inspection, a technician may find soft, crumbling edges, material that flakes away under light pressure, and an uneven surface texture.
At this stage, repairs usually aren’t enough. A deteriorating mortar crown should be completely removed and replaced with a properly constructed concrete crown that includes the correct slope and a drip edge to direct water away from the chimney.
Separation at the Flue Liner Collar
The joint where the crown meets the flue liner is one of the most common failure points.
Because the flue liner and chimney crown expand and contract at different rates during heating and cooling, movement over time creates a gap around the liner.
That gap provides a direct path for water to enter the chimney system.
A technician checks this area with a flashlight and probe during the inspection. If the liner is still in good condition, the joint is cleaned and resealed with a flexible, high-temperature sealant—not standard household caulk.
If the flue liner itself is cracked or damaged, that issue must be repaired before the crown work is completed.
Water Intrusion with No Obvious Crown Crack
Sometimes homeowners notice water inside the firebox or staining on the smoke chamber walls even though the crown appears intact from the roof.
Diagnosing this type of leak takes more time.
A technician will rule out other possible entry points, including damaged flashing, an improperly sealed chimney cap, or water penetrating the brick masonry itself. Water testing may also be performed to isolate where moisture is entering the system.
In many cases, the crown appears solid on the surface but contains internal voids or was made with an overly porous mix that absorbs water during heavy rain.
When deterioration is minimal, a penetrating waterproof sealant may solve the problem. If water absorption is extensive, replacing the crown is usually the longer-lasting solution.
Spalling Brickwork Below the Crown
Spalling on the top two or three courses of brick directly beneath the crown usually indicates that the crown has been failing for quite some time.
Instead of shedding water away from the chimney, the damaged crown allows moisture to run beneath its edge, saturating the upper brickwork. Repeated freeze-thaw cycles eventually cause the faces of the bricks to break apart.
Repairing damaged brick without first correcting the failed crown only leads to recurring problems.
The proper sequence is to repair or replace the crown first, then restore the damaged masonry below.
For a standard single-flue chimney in the Baldwin area, combined crown and masonry repairs typically range from $600 to $1,400, depending on chimney size, roof access, and the amount of brick restoration required.
Crown Damage After a Chimney Fire
A chimney fire can crack or shift the crown even when damage isn’t immediately visible from the roof.
According to NFPA 211, a Level 2 chimney inspection is required after any known or suspected chimney fire.
During that inspection, the crown is carefully examined for new cracks, movement, or separation around the flue liner.
This isn’t simply a maintenance concern. A damaged crown following a chimney fire is a safety issue because continued water intrusion can accelerate deterioration within a chimney system that may already have sustained heat damage.
What the Repair Process Actually Looks Like
A typical chimney crown repair in Freeport or Baldwin takes approximately two to four hours for most single-flue systems.
The technician removes any loose or deteriorated material, thoroughly cleans the crown surface and flue collar joint, applies the appropriate repair material whether that’s a flexible crown coating for minor cracking or a complete concrete replacement and finishes the surface with the proper slope and drip edge.
Replacement crowns generally require 24 to 48 hours to cure before the fireplace can be used.
If a protective sealant is applied, it should be installed after the crown has cured and then allowed to cure separately according to the manufacturer’s recommendations.
A reputable contractor should also document the chimney’s condition before and after the repair with photographs, explain what was found during the inspection, and point out any additional issues that may require future attention, even if they aren’t part of the current repair.
Schedule a Free Inspection for Your Baldwin or Freeport Home
Chimney crown problems don’t get better on their own and catching them early can prevent far more expensive masonry repairs later.
Ridgewood Chimney provides free inspections for homeowners throughout Nassau County, including Baldwin, Freeport, Oceanside, and Merrick.
Contact us to schedule an inspection, and we’ll provide a straightforward assessment of your chimney’s condition and recommend only the repairs that are actually needed.